
The modern writer’s holy grail is a good word-processing program or software. Nowadays, you have plenty of options, but we’d argue that Google Docs is one of the best. Using Google Docs for writing might not be as intuitive or familiar as using something like Word, which has been around for decades. However, the learning curve behind Docs is arguably lower than Word’s.
It’s not too challenging to figure out how to correctly use all of Doc’s bells and whistles – that’s why we’re here to help! Plus, Docs is not only 100% free to use, but it’s also cross-platform and offers live collaboration. But what we like most about Google Docs is that it allows you to customize your projects to your liking.
All this is to say that Google Docs is a fine option for writers to use for their work. To help you get started, we’ve created this comprehensive guide to Google Docs for writers of all kinds. Whether you’re using Google Docs to write a book, article, script, or something else entirely, our insight will help set you up for success.
Google Docs for Writers: The Basics
Create Your Google Docs Account
Before you can start experimenting with Google Docs, you’ll need a Google account. This grants you access to all of Google Suite – Docs, Sheets, Gmail, and more.
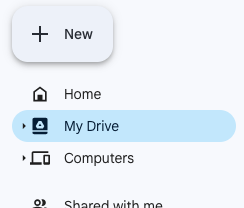
Head to https://docs.google.com to get started. You’ll be prompted to sign in or create a new account. Fill in your information and verify your account as needed. After creating an account, take a second to also visit your Google Drive. This is your storage cloud where all your files and folders can be found.
When you’re ready to start writing, visit the Docs homepage or hit the “+ New” button in your drive to create a new file.

FUN FACT: If you’re on a Chrome browser, you can actually Google the phrase “Create Doc,” and it will create a new document for you.
Getting Started: Google Docs for Writing Books, Articles, & More
Get to Know Your Document
Welcome to your Google Doc! There are a few key spots you should pay attention to when you open a new document:
- The title, which will be set to “Untitled document” by default.
- The toolbar, which is located just below your document title.
- Your sharing button, which is located in the upper right corner of your screen.
Change your title as you see fit. This will also be your file’s name if you download it as a Word Doc, PDF, etc.
Next, take a look at your toolbar. The text beneath your title is where you’ll find basic settings that affect your entire document, including those below.
- File: Edit page settings, download your document, etc.
- Edit: Undo, redo, copy, and paste.
- View: Enable and disable features like the outline, ruler, and equation toolbar.
- Insert: Add images, drawings, tables, special characters, and more.
- Format: Change how the document looks: font, spacing, margins, etc.
- Tools: Access spelling and grammar check, the word counter tool, etc.
- Extensions: Access your Docs add-ons here.

The toolbar itself (the grayed section with symbols) is fairly self-explanatory. Hover over each icon to see its function. Your toolbar also allows you to change your text style (to use headers or subtitles, for example), change your font, and adjust other stylistic choices.
Write Your Content
Before you get too bogged down by using all of the fancy features you’ve just discovered, hit pause. Focus on creating your written material before worrying about polishing it up.
It’s much easier to change appearances once you have the material. Plus, if you start making stylistic changes early, they’re likely to be messed up by the writing process.
So, write to your heart’s content! Make sure you indicate where you might want certain features (such as a header or image), so it’s easy to go back and make these tweaks later on.
Share Your Writing
As you write, don’t forget to ensure you’ve shared access to your document as needed. If you skip this step, no one else can open, edit, or comment on your Doc. Head to the blue “Share” button in the upper right corner to start. Your settings will be private by default.
You can share access with individuals by adding their email in the “Add people or groups” bar. Or, if you’d like to ensure anyone with the Doc link (or anyone on the internet) can access the writing, head to the “General access” settings. Select your audience, then choose whether they can be commenters, editors, or viewers.

Make it Pretty: Google Docs Formatting 101
With your writing as the skeleton, your Google Docs formatting choices can be the meat of your piece’s design. Looking nice isn’t a requirement for all Docs writing – if you’re just using Docs to create drafts or get your thoughts onto the page, you don’t need to worry about its style.
But if you plan to submit Docs to clients, download them as other file types, or upload them as they are, it’s a good idea to ensure they look clean and professional. For us at Inkless, style, and format help us turn in a consistent product to our clients. Not only are our pieces reliable, but they’re fun to read and look at.
The Essentials: Spacing, Margins, Alignment, Etc.
Your Doc will be set up with default spacing, margins, and alignment settings, but you can easily change them to suit your needs. First, go to File > Page Setup to change the page’s size, margins, etc.

To tweak the spacing on your Doc, choose the three dots at the far right end of your toolbar (“More”), then “Line & paragraph spacing.” The default spacing setting is 1.15, which looks nice for most projects. You can choose to “Add space before/after list item” to add some extra white space around your paragraphs without changing the spacing settings.
In the “More” menu, you’ll also find icons for alignment, adding bullet points and numbers, creating indents, and more.
Let’s Talk Fonts
It’s impossible to create a Doc without asking the age-old question: which font is the best? It all depends on your style and niche. Regardless of what you choose, make sure it’s clean and readable. But don’t be afraid to have a little fun with font selection! Small adjustments like these can help your text stand out from the crowd.
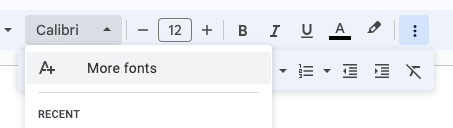
Google Docs comes with plenty of fonts, but you’ll start with a limited selection. Choose “More fonts” to add more styles to the list you can access when editing documents.
Some popular fonts for writers include:
- Times New Roman
- Arial
- Calibri
- Montserrat
- Georgia
- Verdana
- Proxima Nova
Adding Images & Other Media
There are two main ways to add images to Google Docs:
- Copy the image and paste it directly into your document
- Go to Insert > Image and upload a file from a URL, your computer, your Drive, etc.
We recommend waiting to add images until you’ve already drafted your text. It’s a lot easier to position them correctly when you have some writing to use as a reference.
If you need to adjust your image size or position, select it by left-clicking as you usually would. Then, click the three dots (“More”) on your toolbar and choose “Image options.”

From here, you can make all the tweaks you need to ensure your images are neat and look how you want them to.
4 Essential Google Docs Tips & Features for Writers
1. Use Google Drawings, Slides & Sheets.
You can use other Google Suite tools like Drawings or Slides to create images, charts, and other graphics. This is a great way to add nice tables, custom images, or even your logo to your work.
How to Do It: Head to your Drive to create new file types. Add them to your Docs by going to Insert > Image > From Drive, or Insert > Drawing/Chart and choosing “From Sheets/Drawings.”
2. Create default styles.
Skip the hassle of changing fonts, spacing, and style details on every document by creating default styles. These change Google’s default text settings when you create or edit a Doc.
How to Do It: Create several lines of text, one for each paragraph style you’ll need (such as Header 1, Header 2, normal text, etc.) Format each line as desired. Then, highlight each line, open “Styles,” and hover over the text type you’re editing. Choose “Update ___ to match.” Once you’ve done this for each text style, save the list as your defaults by going to Styles > Options > Save as my default styles.

Once your changes are saved, go to Styles > Options > Use my default styles to apply them to any new or existing document.
3. Use keyboard shortcuts.
Save yourself lots of clicking and make the writing process quick with keyboard shortcuts.
How to Do It: Pay attention to shortcuts listed when you hover over specific tools or functions. Familiarize yourself with basic shortcuts to get started. Note: Mac users can use CMD instead of CTRL in these shortcuts.
- CTRL + C = Copy the selected text or image.
- CTRL + V = Paste the selected text or image.
- CTRL + K = Open the hyperlink tool for the selected text or image. Paste your link, then hit “enter” to apply it.
- CTRL + F = Search for a specific word in your document.
- CTRL + Z = Undo your last action.
- CTRL + Shift + C = Open the Word Count tool. Check the box in the lower left corner to show the word count as you write.
4. Look for Google Docs add-ons to make life easier.
There are plenty of Chrome Extensions and Google Docs add-ons you can use to make changes directly in your Doc.
How to Do It: Either head to the Chrome Store to download extensions or go to Extensions > Add-ons > Get add-ons on your Doc. Choose the tools that suit your needs. Below are some of our favorites.
- Grammarly – Use the extension to have Grammarly scan your Docs in real-time. No need to copy and paste your text into the Grammarly platform!
- Headline Studio – This extension helps you create fun, punchy, and SEO-optimized titles and headers.
- Hypatia Math – This popular math add-on tool creates equations, functions, and more.
More Frequently Asked Questions, Requests, and Concerns
Why is my cursor white in Google Docs?
If your cursor is invisible or white in Google Docs, you might be in “Suggesting” mode. You might also be using a specific theme or tool that changes your cursor’s color. Fix it by selecting the pencil on the far right side of your toolbar and choosing “Editing.” If that doesn’t fix the problem, try resetting the theme by going to Format > Clear formatting.
How to create a vertical line in Google Docs
The easiest way to create a vertical line in Google Docs is by using a Google Drawing. Go to Insert > Drawing > + New. In the pop-up, use the Line tool to draw your vertical line (Pro tip: hold down shift as you draw to ensure the line is 100% straight). Save and close the drawing to insert your line into your Doc.
How to duplicate a page in Google Docs
Duplicate an entire page in Docs by highlighting all of the text, images, headers, etc., on the page. Then, copy your selection. Place your cursor where you want the content duplicated, and press CTRL+V to paste it.
How to convert a Google Doc to Word
You can download your Google Doc as any file type, including a Word document, right from the toolbar. Here’s how:
- Go to File
- Hover over Download. A list of file options will pop up to the right
- Choose ”Microsoft Word (.docx)”
- Your document will begin to download as a Word file. Click on the download once it’s completed to open the file in Microsoft Word
How to print double-sided on Google Docs
Either head to File > Print or press CTRL+P to open the Print menu. Choose the option for double-sided printing that comes up in the print settings dialog box. If this option doesn’t show up for you, it may be because:
- Your printer doesn’t support double-sided printing.
- The Docs Print menu can’t recognize your printer’s capabilities. Try downloading the Doc as another file type (like a PDF) and printing the new file instead.
- Your printer doesn’t support double-sided printing.
- The Docs Print menu can’t recognize your printer’s capabilities. Try downloading the Doc as another file type (like a PDF) and printing the new file instead.
How to center text in Google Docs
Changing the alignment of your text in Docs is easy. Follow these steps:
- Click the three dots on your toolbar for “More” options.
- Choose Align & indent.
- Select center align. Alternatively, align the text with the shortcut CTRL+Shift+E (CMD+Shift+E for Mac).
The Bottom Line
Phew! We’ve made it to the end. Congratulations; you now have the information you need to create beautiful, professional Google Docs!
There’s still more to discover – far more than we could list in one article – so it’s always a good idea to give yourself plenty of time to explore different features when you work on a project.
We hope our tips have taught you something new or inspired you to take your Docs to the next level. In a competitive industry like writing, sometimes the little things make the biggest difference. We know our clients value our polished and detailed written pieces.
At Inkless, we’re all about pushing the envelope when it comes to creating written content. From charts and tables to images and styled text, our Docs tricks give us a competitive edge. We think outside the box and find new, interesting ways to enhance our writing. The difference in our writing’s quality and value speaks for itself.
If you’d like to see how our skills can help your organization reach new audiences, connect with readers, and make a name for itself, contact us today. We’re more than writers: we’re thinkers, planners, and strategists. Reach out to info@inklessagency.com to learn more about what we can do for you.